Last update at : 05/12/24 à 16:49
1: Unlock the storage box lock in the studio using the open button on your reservation. If you have trouble opening it with your smartphone, use the code provided after tapping “I can’t open/close” then press the 🔒 button to open.
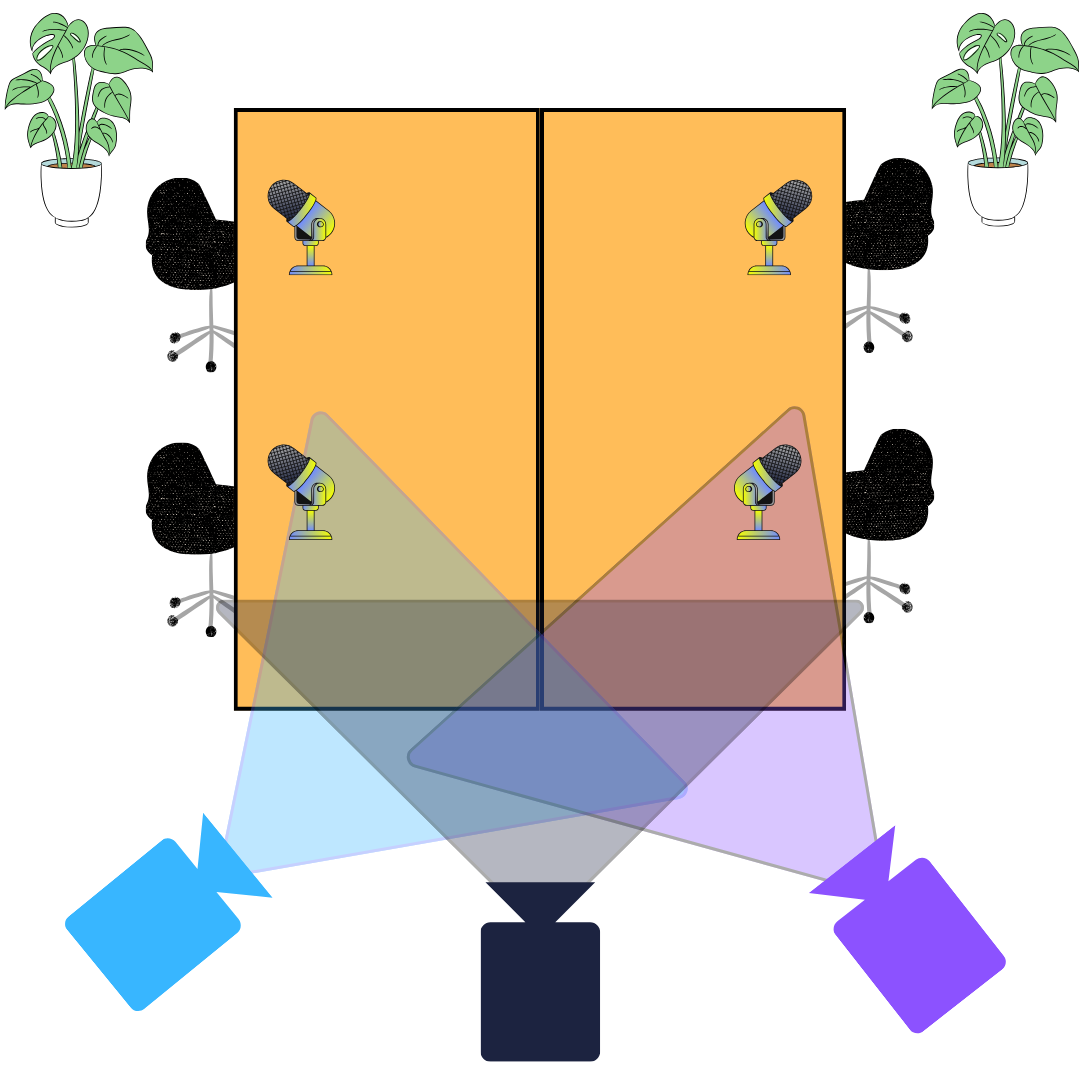
2: Set up the 3 cameras on the 3 designated stands (camera stands as well as tall microphone stands can be used). Position the stands to achieve these 3 angles:

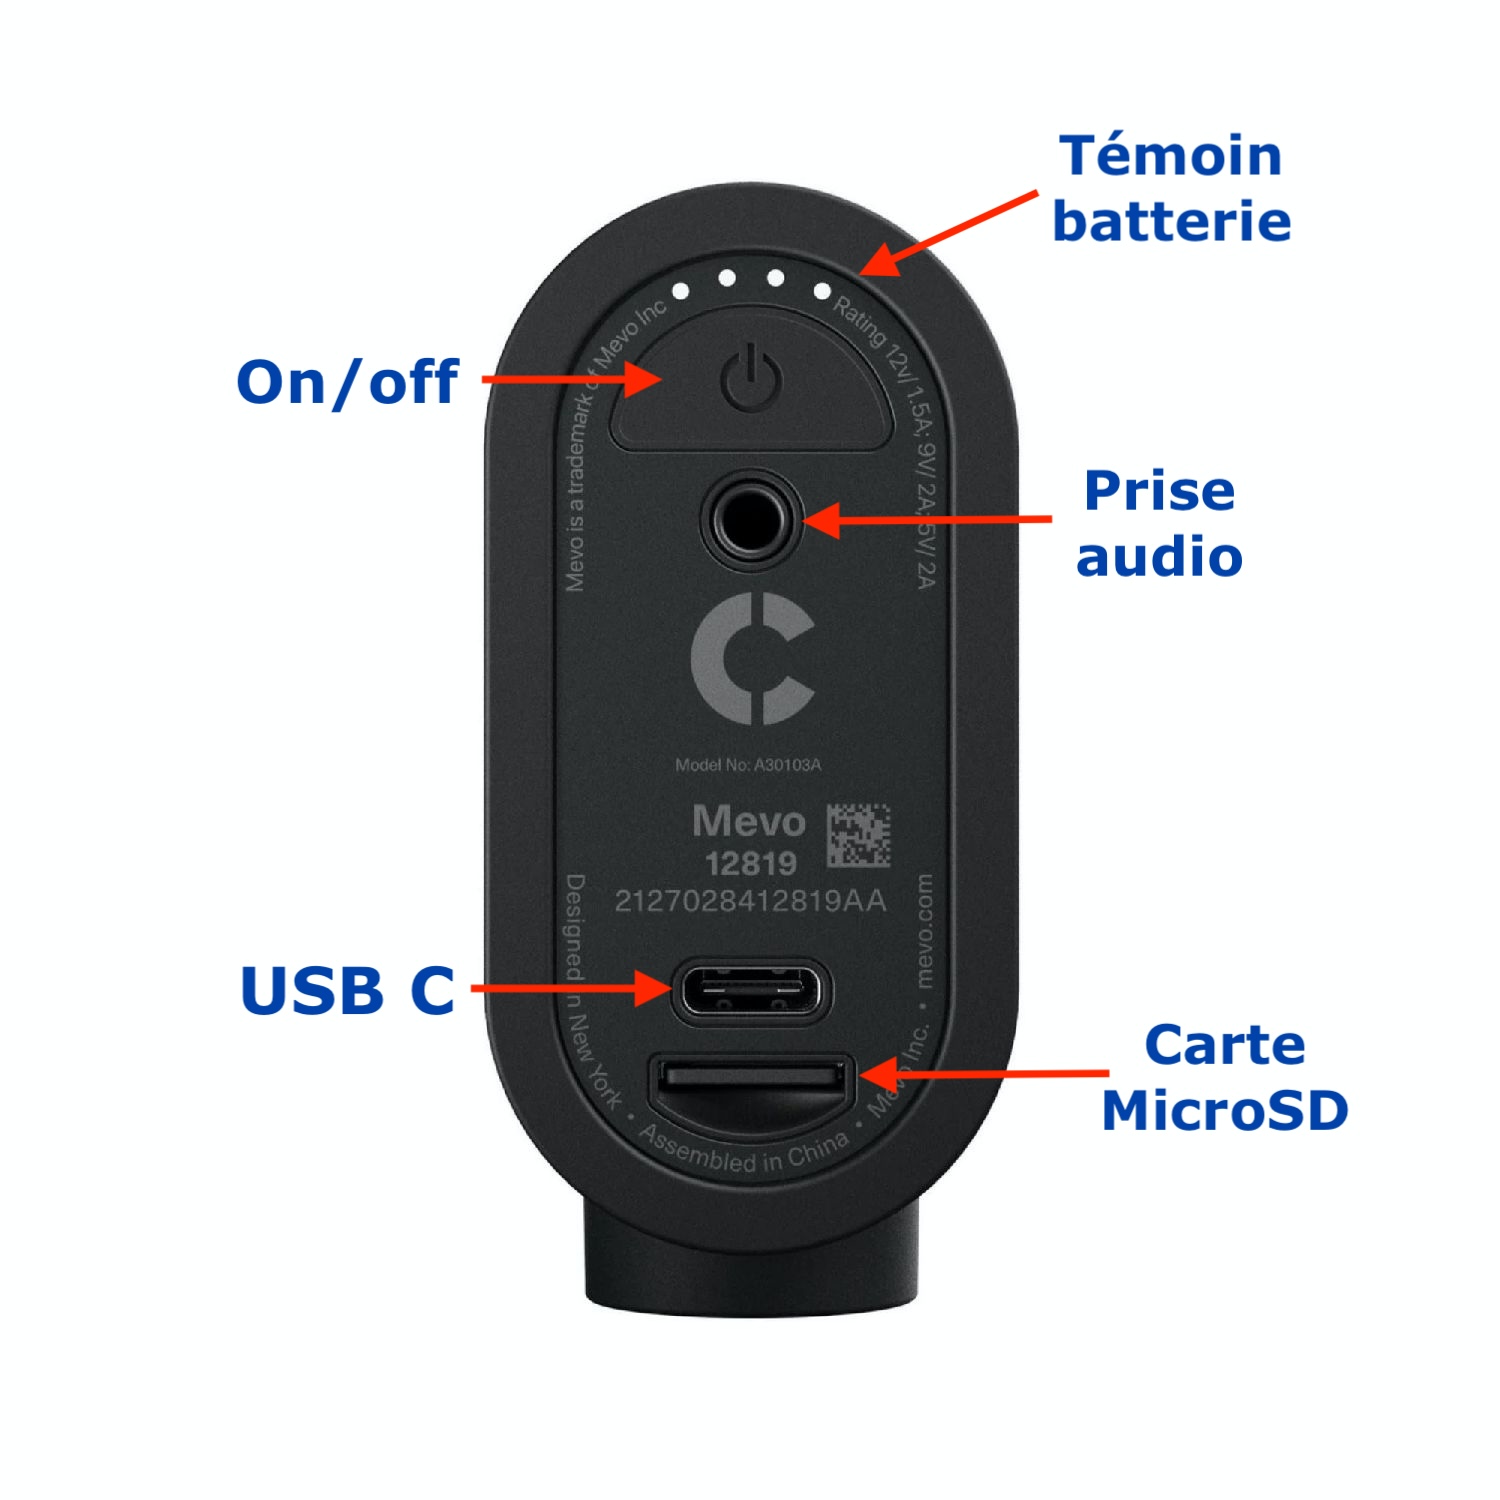
3: Turn on the cameras by pressing and holding the button on the back panel and gently insert your MicroSD cards upside down into each of them. The silicon panel should be facing upwards. At this point, check the battery indicator. A lit point equals approximately 1 hour and 30 minutes of recording, or 6 hours of total battery life. If one or more cameras are low on battery, connect them using the USB-C charger in the storage box to the power outlet. You can use them while charging.

4: Press the button on the back to start recording. The LED on the front of the camera will then turn red. Press this same button again to stop recording. To view the video feedback, follow the rest of the tutorial for using advanced features.
5: Once recording is complete, the files from each camera are saved on your MicroSD cards in the DCIM folder. Retrieve your cards and upload your files to your computer for editing.
Use the Mevo Multicam app for video feedback and live editing:
1: Connect your device to the studio WIFI using the codes provided in the reservation, then download the Mevo Multicam app on this device. Accept the permissions for Bluetooth, WIFI, and location use if prompted.
2: Once the app is launched, connect the cameras by adding a new source using the + icon at the bottom left of the screen. Select “Camera”. The app will prompt you to pair the cameras: switch each camera to Pairing mode by pressing and holding the button for 3 seconds. The cameras will then appear on the screen with a “setup” button.
3: Tap the Setup button, choose the WIFI connection, and connect them to the studio WIFI if not already done. The WIFI codes can be found on your reservation. Once all cameras are configured, a blue “Connect” button will appear, tap this button for each camera to see them in the app. For more information and help, please follow the official instructions.

4: On the main view of the app, you will see the thumbnails for each camera, allowing you to get video feedback and live editing function. Tap “REC” to start recording on all three cameras at the same time. If you are also recording on your device, the selected thumbnail will be highlighted during editing. You can then change the main shot by tapping the thumbnail of the camera you want to feature for live editing.
5: When you tap “Record”, each camera will record its stream on its MicroSD card, allowing you to have separate takes, and the live editing will be saved on your smartphone/tablet, limited by the available space on it. Ensure you have enough space on your device and that the MicroSD cards are properly inserted in each camera.
5b: You can modify the recording settings in the app menu accessible by the three dots at the bottom right of the screen. You can also send the result of the live editing to your computer by following these instructions.

1: Connect the Rodecaster Pro II to one of the three cameras using the provided mini-jack to stereo cable in the storage box, or already connected to the Rodecaster.
2: Connect the thicker jacks to the back of the console in the 1/L and 2/R inputs, indicated by a speaker icon. The order does not matter.

3: Connect the other end of the cable (the thinner jack) to one of the three cameras. The app will detect that you have connected the camera online. Then tap the audio icon at the bottom right of the main screen to open the mixer and adjust audio levels.
4: If you are using the live editing function, mute the audio for all cameras (see red arrow), except the one you have connected the cable to (you can identify the track using the audio jack icon at the top left, see green circle and green arrow). This prevents mixing the sound from the camera microphones with that of the recording console, thereby improving quality.

5: Now the camera is synchronized with the audio, all that’s left is to conduct a recording test before your final show.
Here are the advanced features you can use with the Mevo app and cameras (follow the links for help): - Automatic Editing “Auto-director”: allows for automatic scene changes, with a time setting adjustable in the app.


